Showing posts with label Bundle monster. Show all posts

Tuesday, 25 December 2012

12 Days of Christmas - Final Challenge!

MERRY CHRISTMAS!!!

I hope you are all having a marvellous christmas day! I am writing this ahead of time as I am planning to be a little busy but will spend a few minutes checking out your Santa nails!


 At first I really wanted to paint Santa's face on my nail - but this was a disaster! I then tried to free-hand paint on a hat but didn't like how it was turning out at all and stopped midway.

 (Although I LOVE the base polish - it's from the OPI James Bond mini collection - The World is Not Enough, and looks soo nice on the nail. But I felt a little dark to go under the red so switched it for my final attempt).


 So I decided to resort back to my old favourite - stamping! I used a Sephora silver as a base and red stamping polish with a Bundle Monster plate and used a dotting tool to dot on some Sally Hansen White Out for my fluff. I think it looks pretty neat but it's a shame I wasn't able to get closer to my original vision! Perhaps next year!


It has been so much fun completing this challenge and checking out everyones nails. Nice job everyone :)

Friday, 21 December 2012

12 Days of Christmas - Wreath

So I wasn't sure I'd enjoy wearing this out so did it quickly before another manicure. I am actually reasonably pleased with the result and it may be something I will replicate later in the week.

I used an off white with a pinkish shimmer that I mixed myself as a base and with a dotting tool and Barry M's #284 dotted on a green circle onto each nail. I used Konad Special polish in red and a bundle monster stamping plate to stamp a ribbon on each wreath. I think it's cute - although totally simple!


Wednesday, 19 December 2012

12 Days of Christmas - Ornaments


Wohoo, so I am finally a little ahead on these challenges I am writing this post and queueing it up a whole 3 days early!

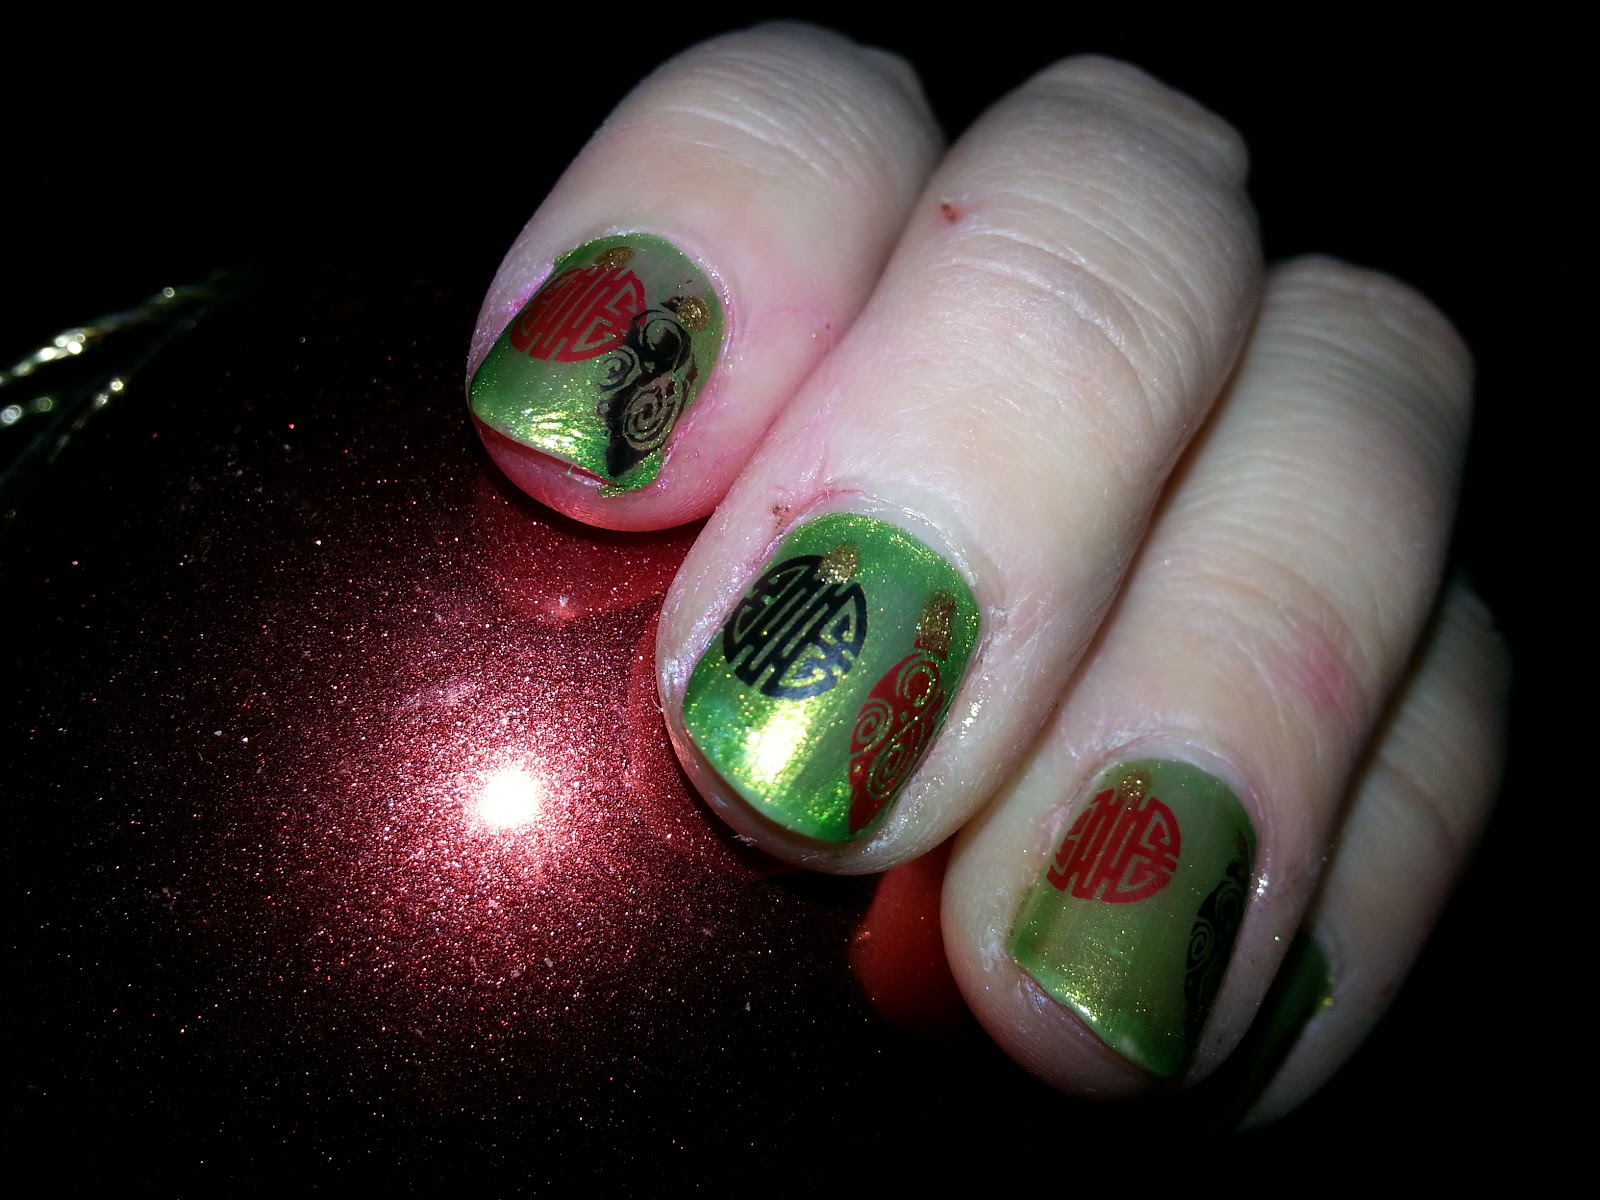
I used Sally Hansen Xtreme Wear in 'Ivy League' for the base and stamped on ornaments with Konad black and red special polish. I added a bit of Sephora 'I'm a Rich Girl' for the tips of the ornmanets.


They actually turned out nicer than I was expecting so this may be a look I replicate. Although I think I'd like smaller ornaments on some sort of tree branch.. There's just so many chrismassy ideas and so few days left!

Sunday, 16 December 2012

12 Days of Christmas - Snowflakes

Let it snow, let it snow, let it snow!


So on Saturday I went to Moncton and got a hold of OPI's On Her Majesty's Secret Service (amongst other things!) and couldn't wait to use it, so that is what I have for my base here.
I stamped using a bundle monster plate and an old Rimmel metal look silver polish. It is actually one of the best jobs I've done using the stamping plates as there is only one tiny mistake on my left hand and everything else seems super neat and marvellous :D

I topped with Gelous (for shine) and then Sally Hansen Insta-Dri (because I'm impatient).


Sunday, 9 December 2012

Challenge #4 Snowmen.

Argh, so I'm a little late getting this in as I've not been feeling so great. I even had to drag myself into work this morning with no nail varnish on at all :O So as I really didn't want to spend too long doing my nails as still feeling kinda bleugh I went with the snowmen stamping. They're not perfect as I didn't take time to correct them but they still look kind of cute. I used A-England Lady of Shallott for the base, and an old Rimmel silver for stamping. I layered over a sparkle from Nina Ultra Pro (I forget its exact name though it's the white holo one) to give it a bit of oomph and to cover up a little bit of creasing where I stamped too quickly. Today was my first go and using Sally Hanson's insta-dri and whilst I love that it has a very similar finish to Seche-Vite it wasn't quite as solid in as quick a time. Though I did try and work quickly so the fault could be mine! Anyways, here's my snowmen, and although I haven't commented much on the snowmen out there this time, they all look great! Puts my little stamps to shame :)


Will try and get some better pictures up too!
 ~~~~~~~~~~~~~~~~~~~~~~~~~~~~~~~~~~~~~~~~~~~
 

Wednesday, 5 December 2012

12 Days of Christmas Challenge - Day 2


So I'm a little upset as I had written this whole blog post on my phone and it seems to have got stuck or deleted.. basically it will not post, so here it goes take two!

The main song that inspired my manicure for this challenge was 'When Santa got stuck up the chimney'. It is the song we are doing for our preschool concert so I thought it would be a fun thing to show the children as they love looking at my nail art! But then I figuired I may aswell throw in 'Rudolph the red nosed reindeer' and to top it all I 'Let it snow'.


It's a little (OK a lot!) rough but I'm reasonably pleased with how it turned out! I think the background colour I used is a little dark as you can barely see Santas boots in normal light but the reindeer stamps are pretty cute and I will be using those again.


So the reindeer stamps are from Bundle Monster plate 214. I did stamp in a sleigh but it didn't show up too well so I ended up painting the whole thing in by hand with a small brush. Everything else was done by a small paintbrush or a dotting tool.


The background colour I used is Sally Hansen Xtreme Wear - Blue It. I love this colour it is so rich and deep! The black I used is of the same brand titled 'Black Out' and one of my favourite blacks as it goes on the nail so well. I used Red Konad Stamping Polish for the edge of Santas suit, for the sleigh I used Barry M's 'Red Glitter' Polish. The roof and chimney is in Sephora's 'Milk Chocolate Chunk' and the reindeer are Rimmel Lycra Wear 'Posh Trash'. For the snow I again used A England's 'Merlin' as I am addicted to that sparkle!


Thursday, 8 November 2012

Black and Gold

I am in love with Orly! I can't believe I haven't really looked at their polishes before. Today I used the gold called 'flare' from the holiday mini collection and it showed up so beautifully on the nail I was taken aback. I used two coats but really that's only because I was painting my nails in the dark so first coat needed smoothing out.

I was looking for something delicate to stamp over it and went with a pattern from BM plate 314, I used Konad stamping polish in black. I was really pleased with how it turned out. I'm finding the stamps on the newer BM plates much larger making it easier to get a good coverage on the nail.


After a couple of days to change it up I added a coat of Essie Matte About You and really liked the matte on this combination.

Sunday, 4 November 2012

Orly Holiday Polishes - Smiley Faces

So I fell for the Orly Holiday Minis collection on my last trip to Sally Beauty. I used Torrid as a base which is so much more shiny and shimmery that it seemed through the bottle that I almost wanted to wear it on its own! I'd made my plan though so layered over a coat of Devil May Care and was pretty impressed with the glitter payoff in just one coat.

I should have left it alone but I couldn't resist stamping so added the smiley faces from BM plate 304 using Black Konad polish. I don't think they showed up so well over the glitter coat and regretted the stamping but after a day I got used to it and thought it looked okay.
I can't wait to try those faces over some yellow polish for a more traditional look though!


Wednesday, 31 October 2012

Halloween Nails

So I actually did a few halloween manicures over the October weeks and I have to say I am so impressed with the bundle monster halloween images. The children at my preschool were very enamoured with the stamps and we made up lots of stories about witches, spooky houses and pumpkins!


First, not necessarily halloweeny but I used Sally Girl 'You Glow Girl' as a base to get a spooky glow was my first attempt at striping tape. Upon the glow base (of which I used four coats to try and get a prominent effect) I arranged striping tape and painted over with Sally Hansen 'Black Out'. I removed the tape and - voila! It turned out really well I think for my first try and it was exciting to see those little glow in the dark lines whenever I walked around in the dark! The glow wasn't amazing though I did keep holding my hands under the light on my phone to get a few seconds of 'wow'!


Next I used China Glaze Orange Knockout which is sooo bright! I added a layer of Nina Ultra Pro Opal Elegance for a shine and stamped on various halloween images with Konad black polish.


The next time I used Nina Ultra Pro Evening Sun for a darker look. I added a layer of Nina Ultra Pro holographic top coat and really liked how they twinkled when they caught the light. I decided I wanted black tips and used striping tape and carefully painted them out with Sally Hansen black out. Although it was a lot more fiddly using striping tape rather than scotch tape I much preferred it, the line was crisper, there was no leakage and I think I did a pretty good job! I added more stamps with the same BM plates using Black Konad polish to finish them off and make them spooktacular! (See what I did there!)


Finally for halloween day I changed them again (!) and used Barry M Spring Green as I needed a green to match my costume (I was a green crayon!). I used the same stamps over it and it looked.. okay. I much preferred the orange but like I said I was the GREEN crayon!


Really enjoyed the whole halloween manicures and wish I'd had more time to be a bit more adventurous!

Friday, 5 October 2012

Purple hearts and a bit of shatter

During my trip to England the 'purple heart' was a big theme for me so my two main manicures were around this.


The first few days I didn't have much time for nail painting so left my fingers how they were and just changed up my thumb, with a silver base and some purple heart stamps. The purple I used (Barry M Vivid Purple) was rather pale for stamping but it was all I had and I was grateful you could see it!


I was much more in love with my second purple heart manicure.  I used a pink base and stamped a purple heart on each nail and surrounded it with black stars. The stamping took some time as didn't use the whole of an image and as you can see it's a little crooked but I was happy with it and every time I looked at my nails I smiled!
After my concerts my nails needed changing up so I used George Molten Metals Enchanted which I picked up when I was there. What a bargain! An awesome metal effect and I love the colour. I topped it with Rimmel Black Graffitti top coat and must say I was impressed. It's been a while since I've used any of my shatter coats but either this is much better than the ones I have or I have forgotten how much I like the effect!

Sunday, 2 September 2012

Silver n Black Stars


The base colour was super shiny so makes it hard to see the stamps but I used Bundle Monster plate 20 to stamp on some stars in silver. 

Wednesday, 29 August 2012

My first homemade polish!

My first attempt at making my own nail polish! I used some clear polish mixed with various eye shadow dusts I had knocking around. I am so excited about how it looks!


I couldn't resist adding a stamp and used this cute wavy line/dot pattern from Bundle Monster plate 20.

Sunday, 19 August 2012

Hearts and Tips


I wanted something bright so used a different colour for each nail and then to group them together stamped on some black hearts (Bundlemonster Plate 03 ) and then added a black tip. It was my first attempt at doing tips - I used the hole reinforcer method! They didn't turn out as good as I would have liked but not so bad for a first attempt I think!

Tuesday, 14 August 2012

Zebra stripes


I am so happy with how well this turned out! The pink is Sally Hansen Extreme Wear in Bubblegum, I wasn't overly keen with how the polish turned out on nails but when I added the zebra stripes (Bundle Monster plate 16) I am in love! It turned out so well and I think my best effort at stamping yet.

Sunday, 17 June 2012

Starry starry night

I LOVE stars and am so excited that I've found an easy way to add them to all my mani's - nail stamping plates!! These stars are from Bundle Monster plate 14 and I used a silver polish - which turned out pretty well as it wasn't an actual stamping polish.